(Sorry this got lost with my old blog, here is the tutorial reposted)

 Above is a few examples of this fabulous little tree! Now let me show you how to make it, once you make one you'll be hooked! The first one is the hardest, you will get the hang of it then you will make a ton of them!!!
 Your basic supplies will be:
- double sided patterned paper
- paper trimmer
- bone folder (it helps make nice creases)
- adhesive
- card stock of your choice
- silver cord & bling brad (if you want to copy this tree topper)
 Start by trimming your patterned paper into squares. You will need 4 squares each one of them 1/2 inch smaller then the next.
 For example the sizes I used for this tree are, (from largest to smallest) 3 in, 2 1/2 in, 2 in & 1 1/2 in.
Then you will fold each from corner to corner.

So that it looks like this when you are done.

pinch and push the 2 sides in like this, then crease it so you have a triangle.

then take 2 points and fold it down so it looks like a little arrow.

When you have them all done then you will tape then to your card. I usually start at the top and sort of nest them inside of each other.
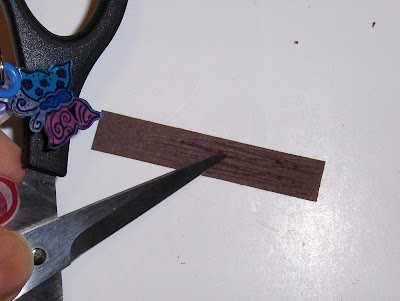
Then I put the little trunk at the bottom.

I did a little scratching on it for the "bark" effect.

I did a little scratching on it for the "bark" effect.


11 comments:
So cool! Got your address from Lay's blog and will jot it down for our sister list. Pat
Hey girlfriend!! Love this card and thanks for sharing the instructions too.
Have a great day!!
Whoa !! This is beautiful ! Thanks for the instruction.
Hi Juliann!
Thanks so much for letting me know your new blog address. Thanks also for posting this tutorial again. I will go and fix my links to it right now :-).
All the best,
Sam.
So beautiful!
Kisses
Hi Juliann! Thanks again for posting this...it really saved me today! I have someone wanting one of these cards she saw on my blog but the link I had was to your old blog and I couldn't remember how to do it, so WHEW! Thank goodness you reposted, lol. Have a super evening.xx
These are really cute and thank you for such a great tutorial! We actually just made these last night and my friend couldn't remember where she found the instructions, so I researched and came across your blog and tutorial! I've posted it on our club blog as you've done a fantastic job with instructions. Thanks so much!!
Sorry, I've posted our work on our club blog...
www.kelliandkaren04302007.blogspot.com
Have a great night!
Hi, Just wanted to say thankyou so much for the christmas card design it's fantastic! I made 10 for friends and family and am a teacher so I'm doing it with my class on monday :)
Helen
I love this tree; thanks for the instructions. I'll be putting it on a layout soon.
Thank you for the tut on how to!
Great tree!
TFS!
Post a Comment